NFTs (non-fungible tokens) enable art aficionados to tide over non-blockchain challenges such as validation of ownership, susceptibility to fraud, and lack of control over secondary market transactions.
Most users, however, face issues creating NFT art. Particularly, anyone with little coding experience is low on confidence when coding. Let us find how to create an NFT art with no coding background. But first we will help you understand what NFTs and fungibility exactly are.
What are NFTs?
NFTs are a kind of cryptographic token on a blockchain. They are a single asset that do not refer to any type of cryptocurrency, but to real-world goods such as art, music, videos, and more.
Fungibility is the ability to interchange a good or property with other personal goods or assets of the same type. Conversely, a non-fungible asset has a completely different value from another NFT of the same or similar value. i.e. NFTs are unique in terms of their qualities and their worth is also not constant.
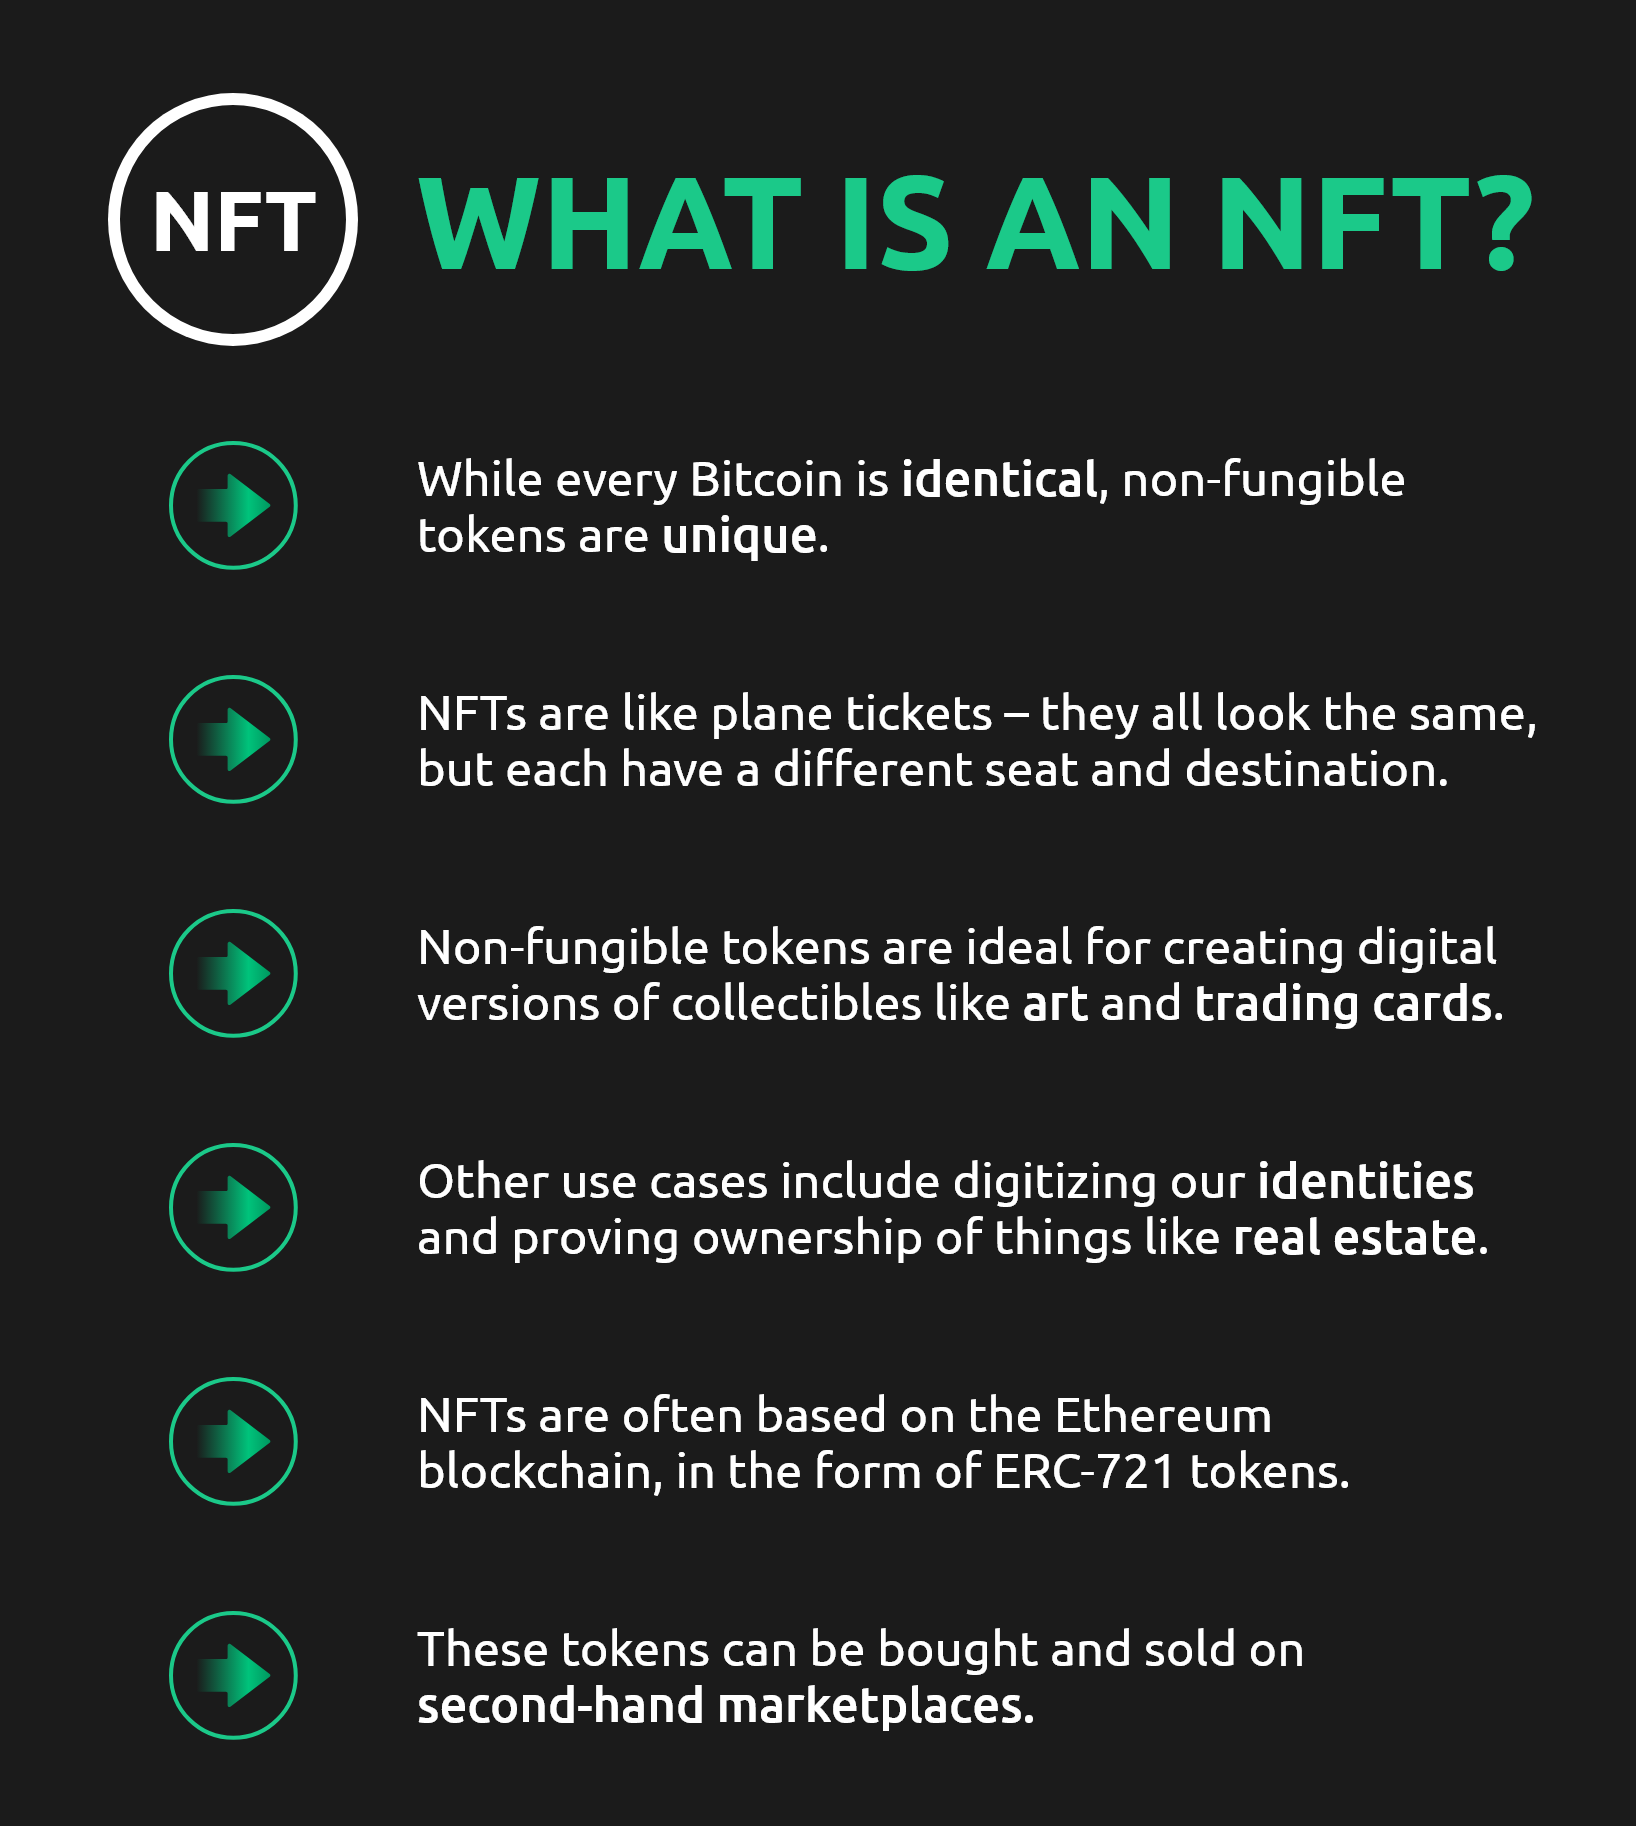
Image: What are NFTs? (Source)
How to create an NFT art
To generate the digital art token, you need to select the NFT MarketPlace. This is the very first step when you are planning to make your own NFT. This peer-to-peer marketplace gives you two categories to choose from.
Curated Platforms: Only authorized artists in this category can mint or create digital art tokens. The focus here is on high-quality digital art tokens, a big no-no for low-quality collectibles. One example is SuperRare. A curated platform has much higher transaction fees and less flexibility on royalty percentages.
Self-Service Platforms: In this category you can easily create your own NFT. Anyone can mint an NFT here in line with their preferences, whether it is video, audio or photography. This will give you the freedom to set a percentage of the royalty for each token sale.
Setting up a digital wallet
The next process is to generate a digital wallet to store your NFTs. ETH is the most common cryptocurrency for operating NFTs though now, there are other blockchains as well that support the non-fungible tokens.
You can use your fiat to buy crypto on platforms such as Binance, Coinbase, and Kraken, and then move the crypto tokens to the wallet of choice. The cryptocurrency can be used for minting NFTs. There are some platforms, however, that allow you to create NFTs for free.
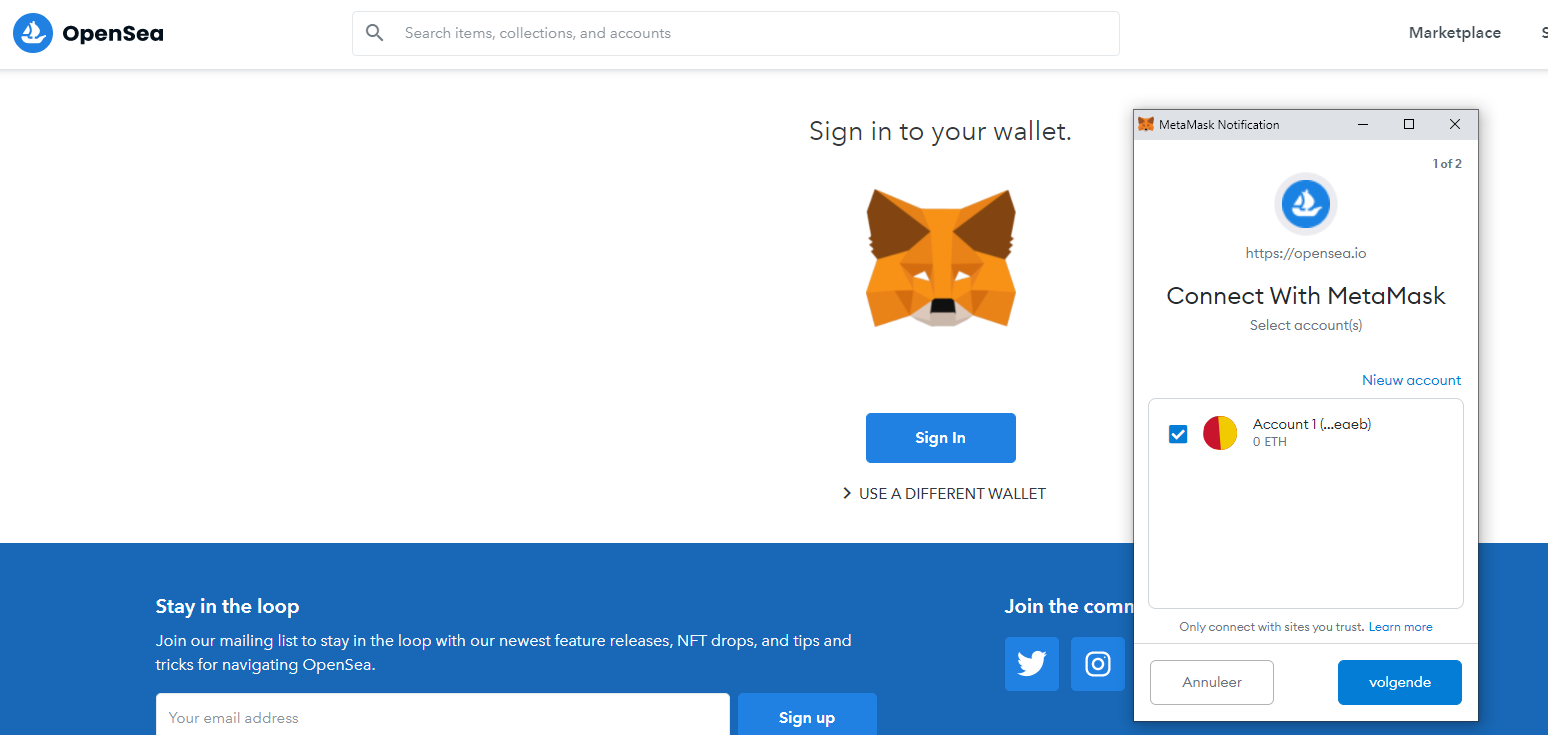
OpenSea is an NFT platform that recommends the Google Chrome extension of the MetaMask cryptocurrency wallet.
Your Collection
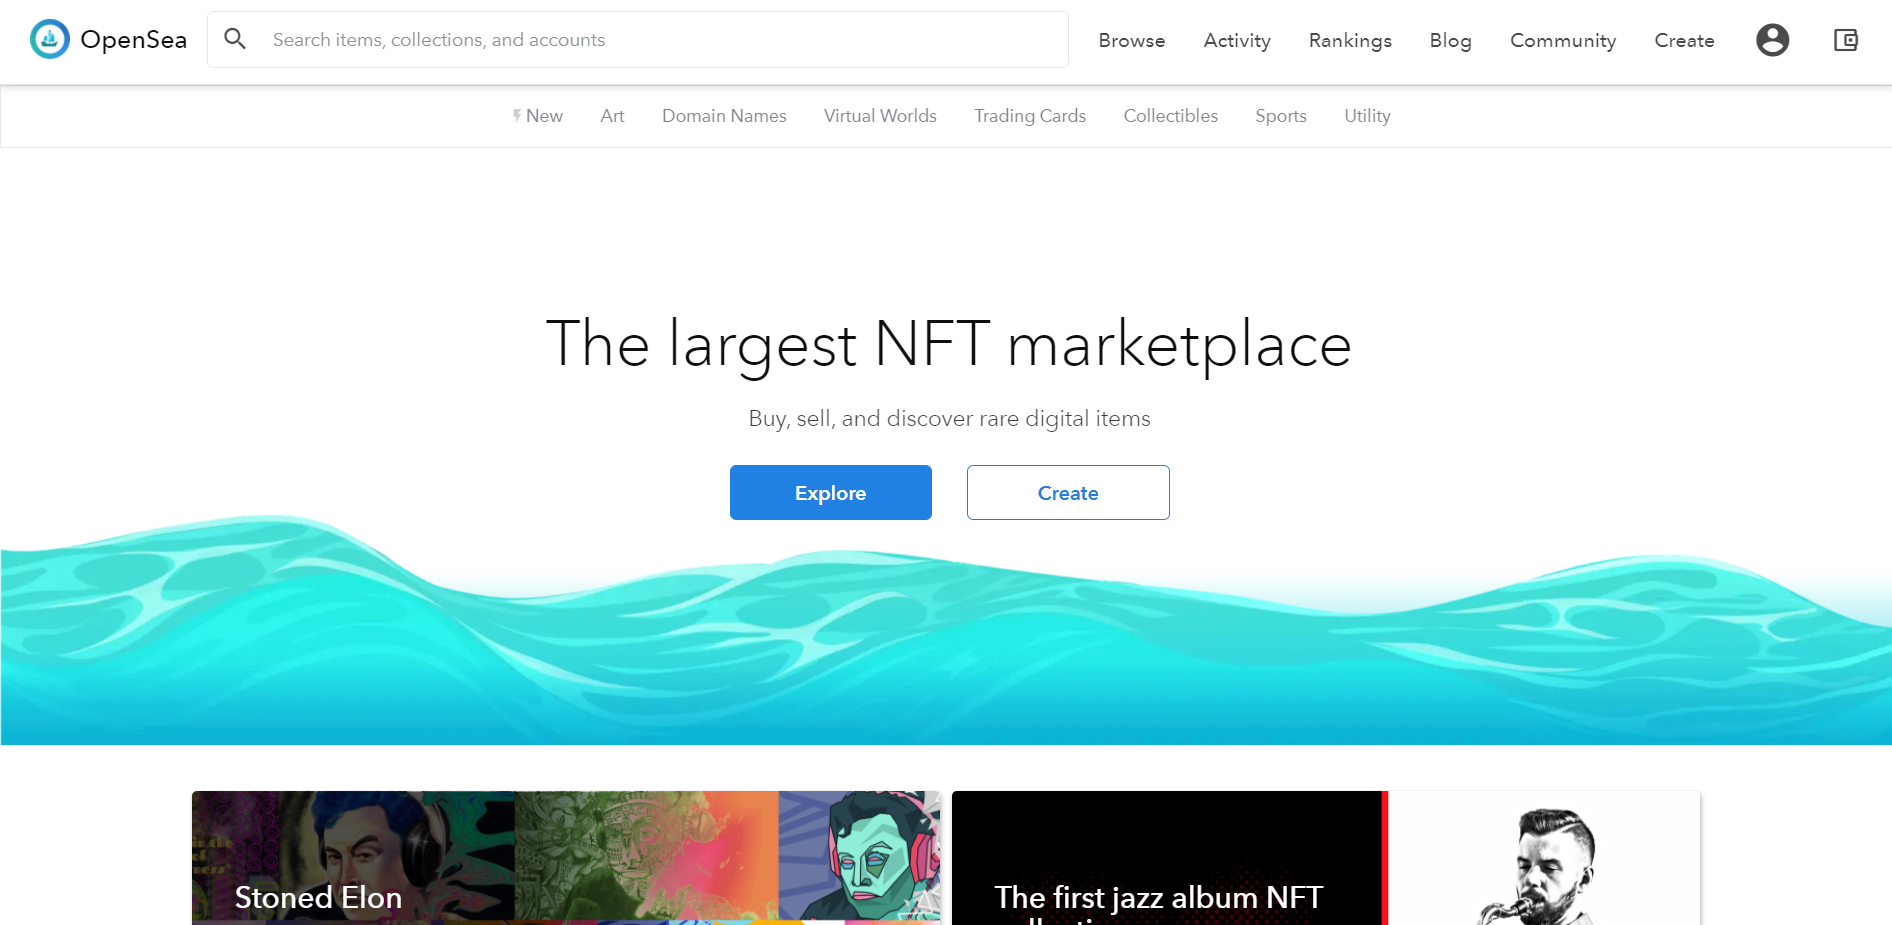
This is the place to create your NFT art and store it. Let us take the example of OpenSea. Here on your account interface, you will see ‘My Collections‘ which is a store or gallery of your digital arts. You can customize your collection by writing a description along with the display image. Your groundwork is complete here with your artwork.
Digital arts token
On most NFT platforms, you can proceed to make your own NFT with ease. Generally, there will be a button mentioning ‘Add New Item‘ and all you need to do is to click it for minting an NFT. It includes metadata, visuals (JPG, PNG, GIF, etc.), audio, and 3D files.
You can usually mint as many tokens as you want but one at a time. You also need to decide how many editions you want to make for the same token. There are two types of tokens you can mint – stand-along and Edition.
Stand-alone token: This refers to a single digital art token, which makes it more valuable.
Edition tokens: Multiple copies of the same token can be created. You just need to add the edition number to maintain a difference between each replica.
Must Read: 4 Must Know things Before Buying NFTs – A Beginners Guide
You can add various properties to your NFT wherever necessary so that possible buyers find it easy to get to your NFT. They may want to get additional information about the NFT and the properties mentioned will make it easier. It will make it easier for buyers to filter your artwork.
After all the required details including social link, updated image, description etc., you just have to click ‘Create‘ to record your NFT onto the blockchain.
The next step is to choose the token you want to accept for your digital art. You may also opt for a percentage of the royalties you will be entitled to receive on secondary sales.
NFTs have just been created and listing them for sale is the next step. You can choose from the options like fixed-price listing, auction, or setting your own price.
Wrapping up
The step-by-step process pretty much explains how you can create a digital art token without coding. NFTs provide artists and content creators with a unique opportunity to not just create an immutable digital certificate for their work but to monetize it as well. NFTs leverage art in any form or medium, so there are no limitations when it comes to the kind of artist you are.
Reach out to QuillAudits
Twitter | LinkedIn | Facebook | Telegram